How to configure vFunction as an MCP (Model Context Protocol) Server for an Application
- Overview
- Integrating with specific IDEs
Overview
A vFunction Extension can be added to a developer’s IDE to extend the capabilities of vFunction to a local workstation. This allows developers to, for example, implement the prompts associated with their vFunction TODOs directly in their IDE by connecting vFunction, the AI coding assistant, and the codebase.
Note that most MCPs require HTTPS and no self-signed certificates, so some organizations may need to add third-party signed SSL Certificates before setting up their MCP.
Instructions for configuring the vFunction MCP can also be found in the vFunction UI:
- From the Application’s Analysis
- Log into the vFunction UI
- Select the relevant App by clicking the drop-down arrow in the top-left corner of the UI
- Select the Analysis tab in the top-center menu bar
- Select the List icon in the top-right corner of the UI to Open TODO
- Select the Tools icon in the top-right corner of the UI to MCP
- Select the relevant tab, e.g. VSCode Extension, GitHub Copilot, Amazon Q, for instructions relevant to your IDE
- From the Dashboard
- Log into the vFunction UI
- Select My Dashboard from the drop-down arrow in the top-left corner of the UI
- Select the Tools icon in the top-right corner of the center pane to MCP
- Select the relevant tab, e.g. VSCode Extension, GitHub Copilot, Amazon Q, for instructions relevant to your IDE
Integrating with Specific IDEs
The vFunction Extension can be downloaded in multiple IDEs. See the instructions below to add the vFunction Extension to a specific IDE.
Kiro IDE
- Open the monolithic codebase in Kiro IDE
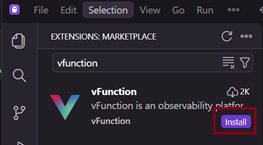
- Search and install the vFunction Extension from the Extensions Marketplace
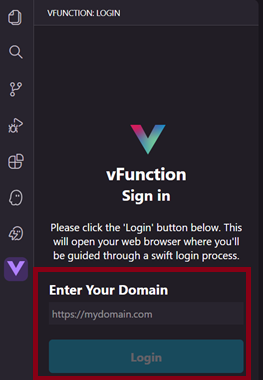
- Log into the vFunction Server from the vFunction Extension. Note that you may be redirected to the browser to complete the login process at an address like http://127.0.0.1:3000/api/vfunction/plugins/vscode.
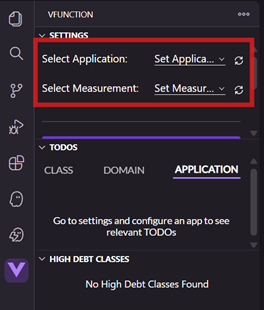
- Set the Application Name and Baseline Measurement
- Install MCP Tools
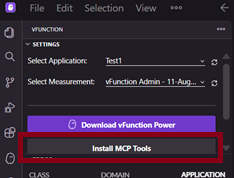
- Download and install vFunction Power
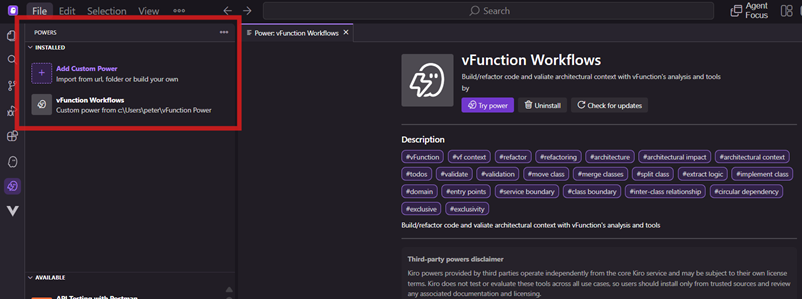
- Click on the Ghost Icon on the left-side bar for Kiro
- Navigate to MCP Servers in the bottom-left pane
- Confirm that vfunction-local MCP Server is present and connected
- Smoke test the vfunction-local connection by running a prompt like, “Give me the list of domains” and confirm that it runs the tool vfunction-local/get-domains
- If issues arise:
- Open the Output Panel in Kiro
- Select vFunction from the dropdown menu choices
- Look for specific error messages
A full end-to-end demo using vFunction and Kiro can be seen below. Jump to 4:30 in the video to move past the introduction to vFunction and directly into the Kiro-specific demo of the vFunction Extension in Kiro.